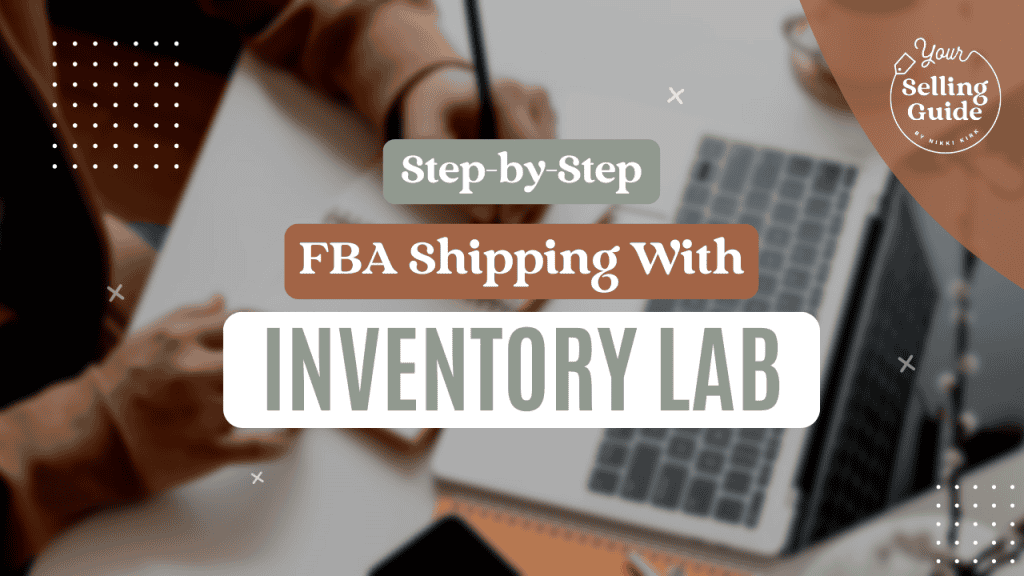
Using Inventory Lab: How to Ship Items to Amazon FBA
Is Inventory Lab worth it? If you know how to ship items to Amazon, you know that manually preparing the shipment is a hassle. Inventory Lab is a game-changer for Amazon sellers. The software streamlines the packing process, sending product to Amazon FBA, and saves valuable time.
In this guide, I’ll explain step-by-step how to send items to Amazon FBA with Inventory Lab. Let’s start supercharging your Amazon FBA shipping process.
Disclaimer: This post contains affiliate links. If you click through and make a purchase, I may receive a commission (at no additional cost to you). Thanks for your support in this way!
What is Inventory Lab?
Inventory Lab is Amazon FBA inventory management software. Amazon sellers use it to prepare to send products to Amazon FBA and track the quantities and details of the inventory sent to the Amazon warehouse. The software also reports your Amazon FBA inventory’s costs and profits.
It’s simple to add products to the platform. Inventory Lab provides more consistent Amazon FBA inventory management software than Amazon Seller Central. I also appreciate the at-a-glance reporting.
Inventory Lab Costs
As of June 2024, Inventory Lab costs $69/month for the base plan. However, an annual plan provides additional savings at $57.50/month.
Remember, purchasing this software is a tax-deductible business expense. Inventory Lab also offers a free 30-day trial so you can see how it can benefit your business before fully committing.
Inventory Lab App
Inventory Lab can only be used through a web browser and doesn’t have an app.
However, complementing its browser-based platform is Scoutify, a companion sourcing app designed specifically for on-the-go scouting needs. While Inventory Lab streamlines tasks like listing and inventory management, Scoutify offers real-time product information, allowing you to make informed sourcing decisions from your phone.
SellerBoard vs. Inventory Lab
When selling on Amazon, it’s useful to have a few different software tools at your disposal, so you can combine the best of each and craft the perfect toolkit that works best for you.
I use both SellerBoard and Inventory Lab for my own FBA selling. Inventory Lab is best used to manage shipping inventory to Amazon, and Sellerboard is optimized for easily analyzing ROI and profit. You can see all the software tools I use and recommend here.
Is Inventory Lab Worth It?
Inventory Lab is a ‘nice to have’ tool in the arsenal of FBA sellers. While Amazon Sellers can accomplish everything Inventory Lab offers in Amazon Seller Central for free, the software’s sheer ease and efficiency make Inventory Lab worth the investment.
I used Seller Central for four years before using Inventory Lab. I haven’t looked back since and wish I had started using this tool sooner!
How to Ship Products to Amazon FBA Using Inventory Lab
Inventory Lab has many uses, including managing your Amazon inventory, shipping, listings, and financial accounts. How you use it will depend on the tools and processes you prefer. I use Inventory Lab specifically for sending items to Amazon FBA and reporting. Let me show you my method for shipping inventory to Amazon and getting the most out of this software.
How to Ship Items to Amazon FBA With Inventory Lab: Step-by-Step Tutorial
Create a Batch Shipment to Send to Amazon FBA
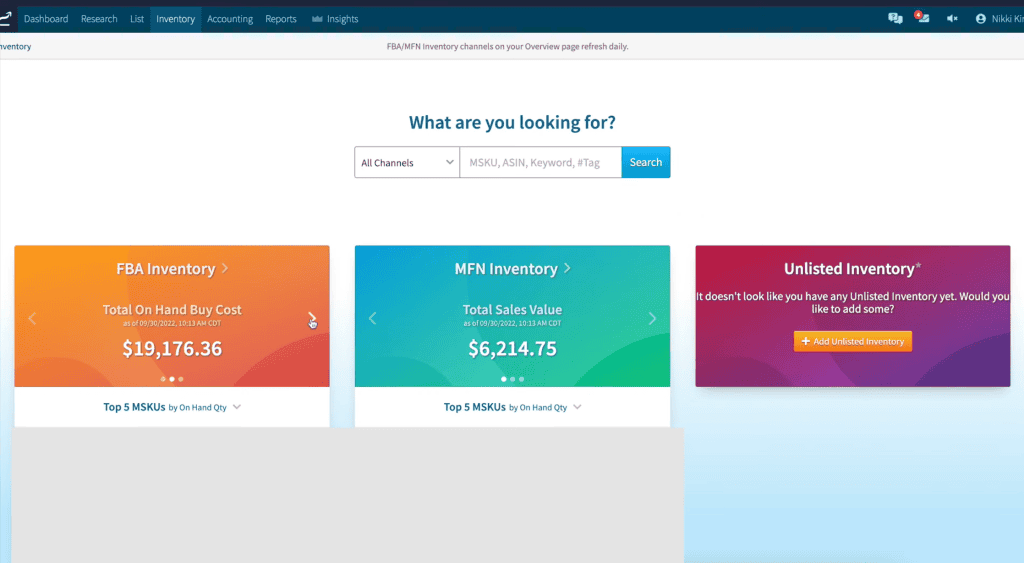
First, navigate to the Inventory Lab Dashboard. There, you can view the total sales volume for FBA and FBM. I personally don’t add FBM products to Inventory Lab, but that’s up to you.
To start shipping inventory to Amazon FBA, select List in the top bar and proceed to the List & Prep section.
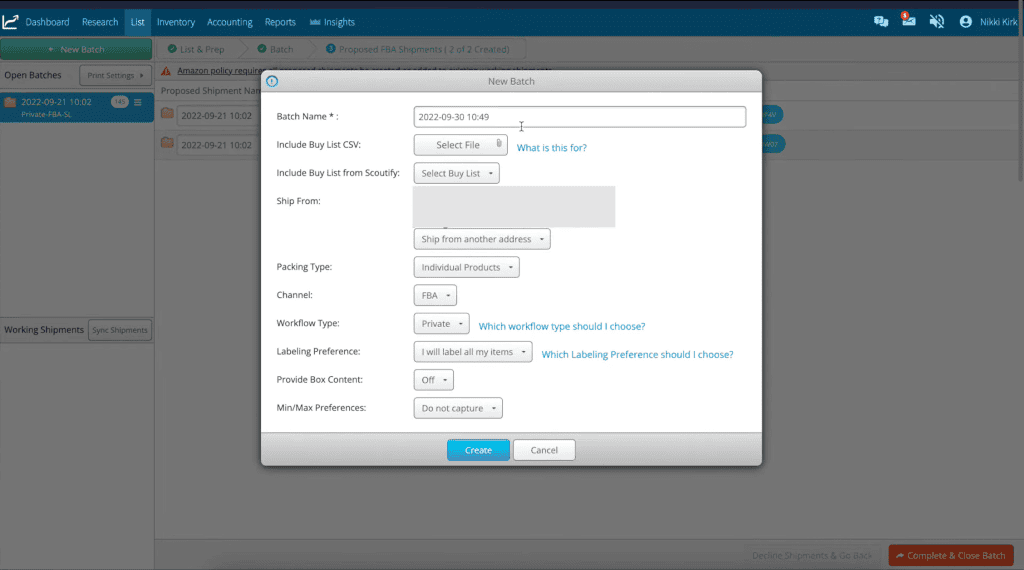
Create a New Batch (you don’t need to name it)
Specify the Amazon packing details:
Packing Type – Individual Products (rather than Amazon FBA case-packed products, which are multiples of the same items)
Channel – FBA
Workflow Type – Private (for single-warehouse shipments) vs. Live (which tells you which warehouse the items will go to as you pack them)
Labeling Preference – I will label all my items
Provide Box Contents – Off
Min/Max Preference – Do not capture
Hot Tip
You can make a buy list to include in a batch in Scoutify. The Scoutify app comes with Inventory Lab.
Add Items to Send to Amazon FBA
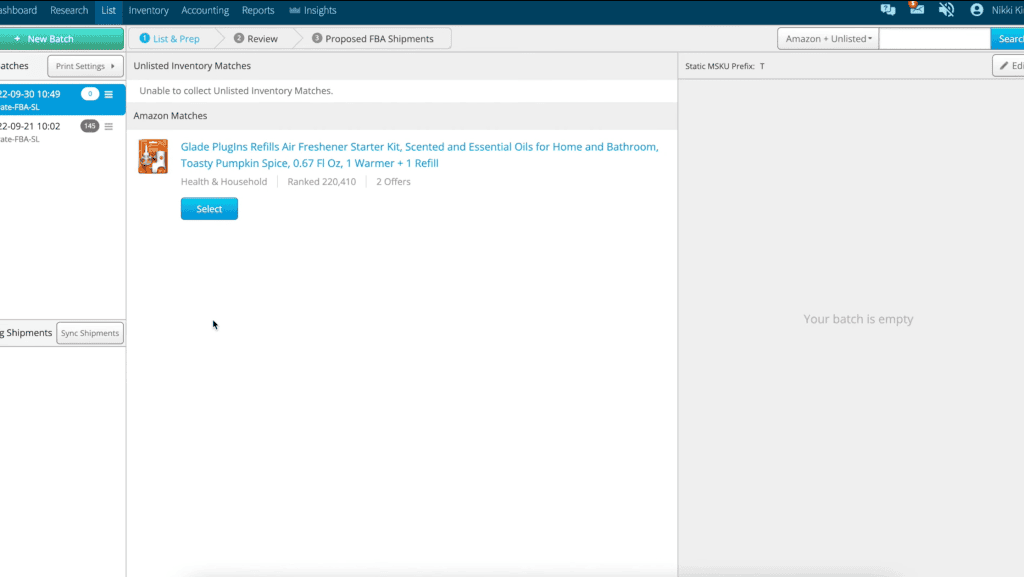
Next, gather all the physical products you’re sending to Amazon FBA and scan their barcodes using the barcode scanner.
If a product doesn’t come up, you can manually find the listing and ASIN on Amazon.
Once you have your product’s ASIN from Amazon, copy it into the top-right search box on the Inventory Lab page. The right side of the screen will show all the current offers, including new, used, and FBA.
Once the item is scanned or manually added, your product should pop up so you can select it.
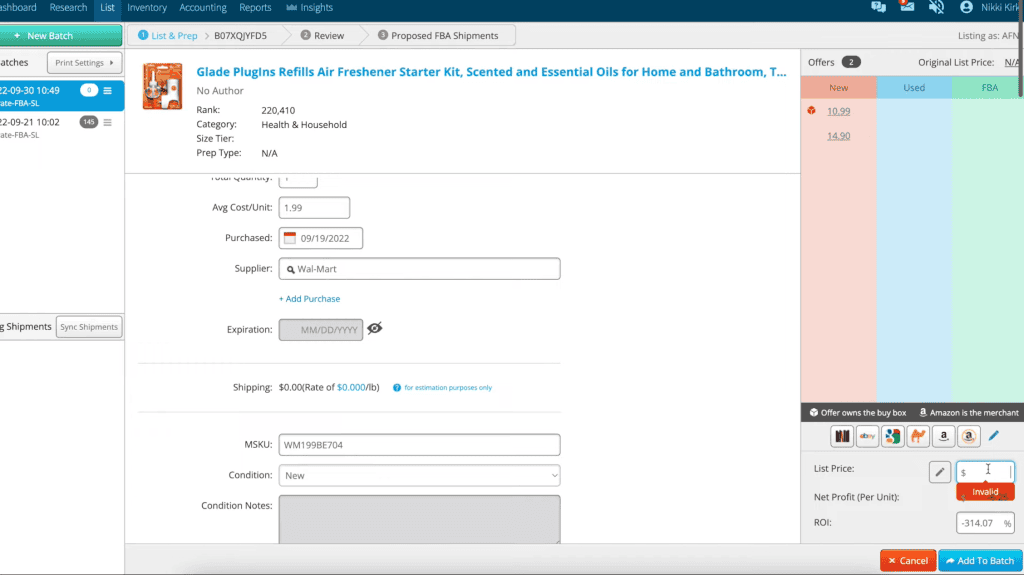
Enter the product details, including Quantity, Cost/Unit, Purchase Date, and Amazon FBA Expiration Date.
The Supplier is where you bought the product (i.e., Walmart). If you’re new to Inventory Lab, you will have to add your suppliers.
You can also set a Reminder, which is useful for managing Amazon FBA expiration dates.
Generate MSKU (Merchant Stock Keeping Unit) codes for easy tracking and management.
Hot Tip
I make my SKUs based on the supplier and cost. For example, the MSKU WM199BE704 breaks down like this: WM= Walmart | 199= $1.99 cost | BE= breakeven | 704= $7.04 is the breakeven price
I use another software, RevSeller, to calculate my breakeven price and see other Amazon listing metrics and ROI insights.
I format my SKUs this way so it’s easy to see how low you can set the price before losing money. For Amazon FBA, SKUs are just for your information, so you can format them however you want. On FBM products, they show up on the customer’s packing list, so don’t reveal anything obvious about your product sourcing and prices.
Add List Price in the bottom right to calculate profit and ROI, then add the items to the batch.
Add all items to your batch one by one and prep each item as their labels print.
Print Labels For Shipping Items to Amazon FBA
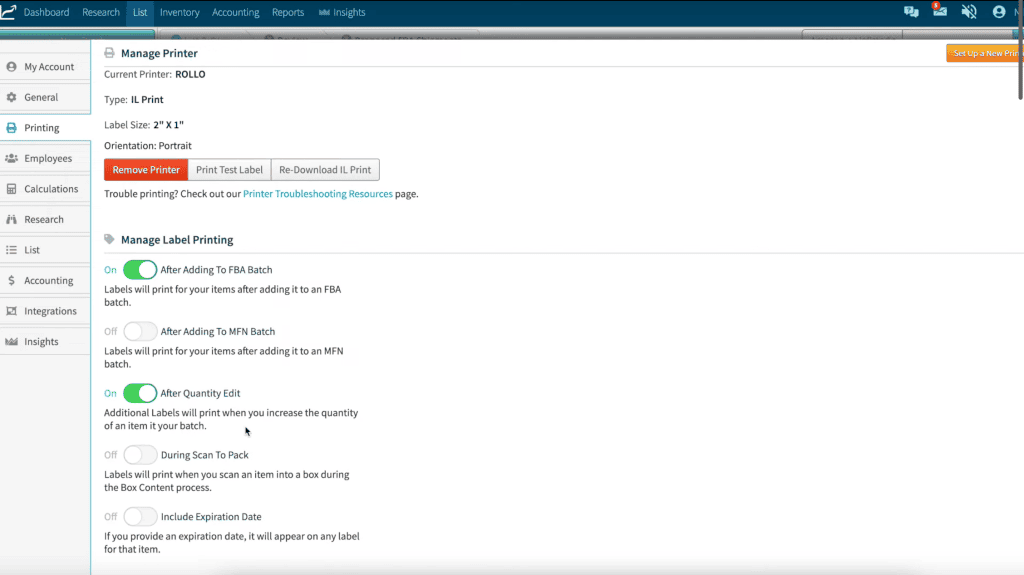
Next, print the labels with a Rollo printer. Inventory Lab also works with regular labels; this will require different settings. However, I think Rollo works best with Inventory Lab and is worth additional investment.
To update printer settings, navigate to Printing, then Manage Printer.
You can change the print quantity, add Amazon FBA expiration dates, and play with other useful settings.
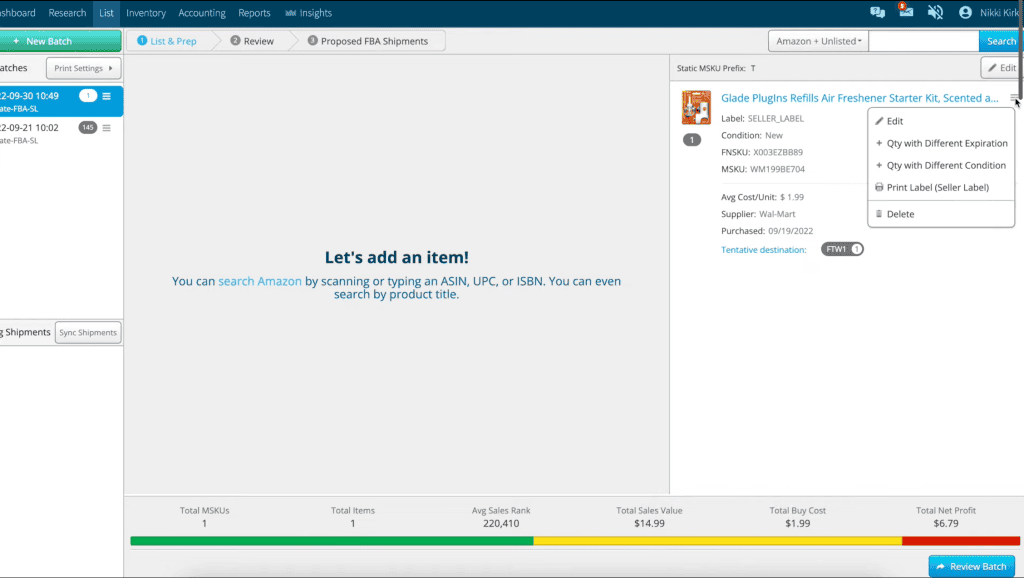
If you need extra labels for an item, select the menu lines in the top right of that item and choose Print Labels.
You can also edit or delete an item from this menu.
Applying Labels to Items You Are Sending to Amazon FBA
Now that you have created and printed the label from Inventory Lab, place the SKU over the existing barcode on each product. If your product has two or more UPCs (barcodes on items), you’ll need to print extra labels to cover them.
You can use small black labels to cover prices and goo-gone to remove extra-sticky price tags (hair dryers can also remove them).
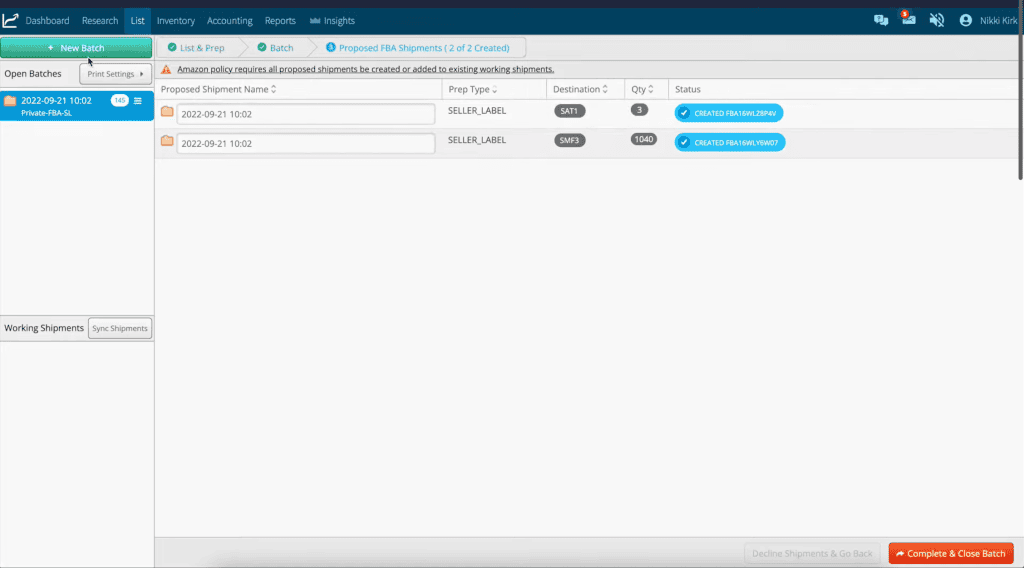
Sync Your Inventory Lab Batch Shipment to Amazon Seller Central
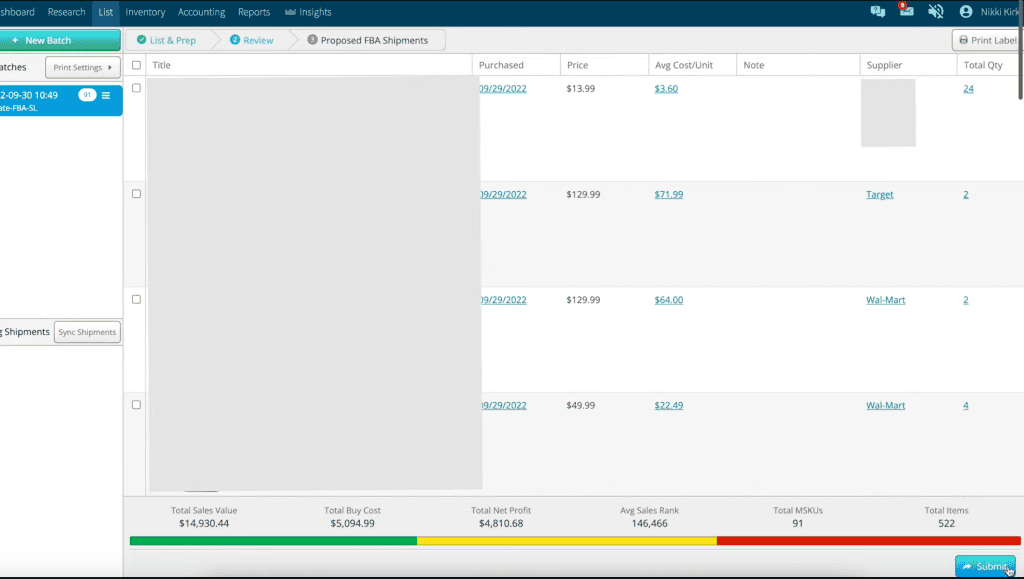
Once all items are packed and labeled, review the batch details in Inventory. At the bottom of the screen batch, you can see the total items, sales rank, and screen.
Submit the batch and sync the information to Amazon Seller Central. Amazon will assign warehouses for the items, which may vary based on size and location.
Box up items by the assigned Amazon warehouse. Make sure the boxes adhere to Amazon’s size and weight restrictions.
Hot Tip
FBA boxes shipped to Amazon can't be over 25" long or weigh over 50 lbs
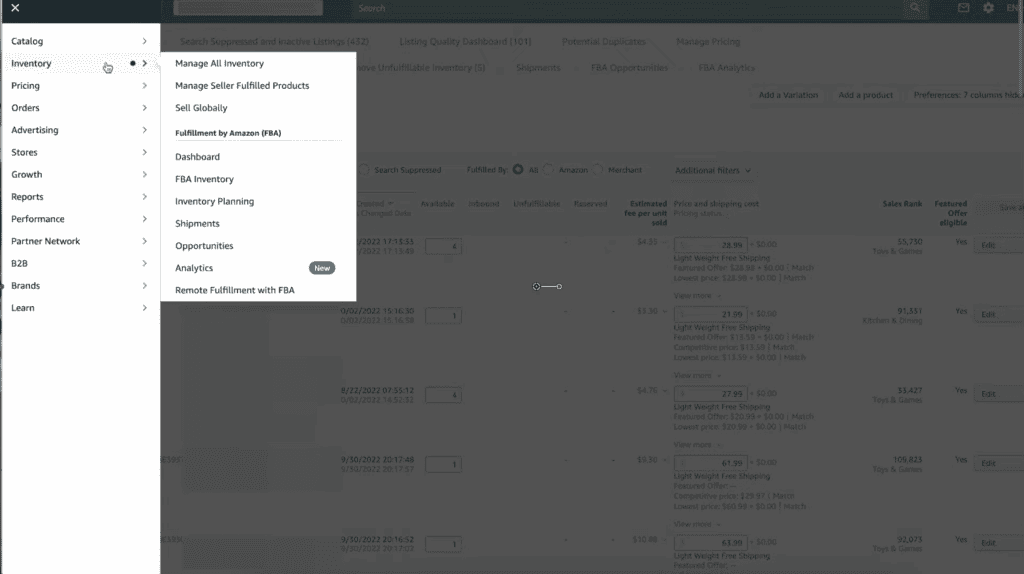
Now we are done with Inventory Lab and will finish our shipment in Amazon Seller Central.
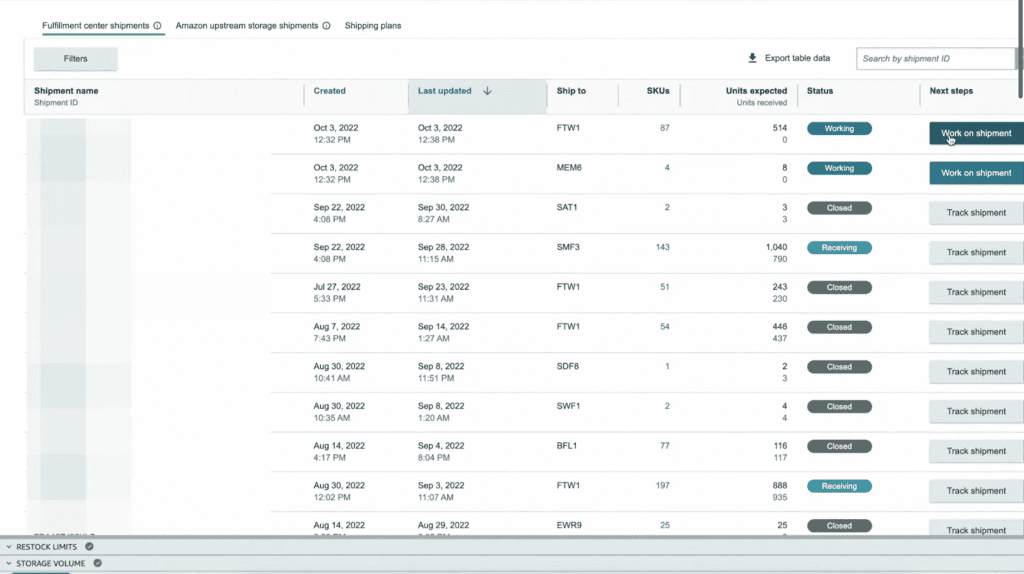
In Amazon Seller Central, navigate to Inventory and then Shipments.
Locate your shipments, which will appear in ‘working’ status, and select the shipment you want to work on.
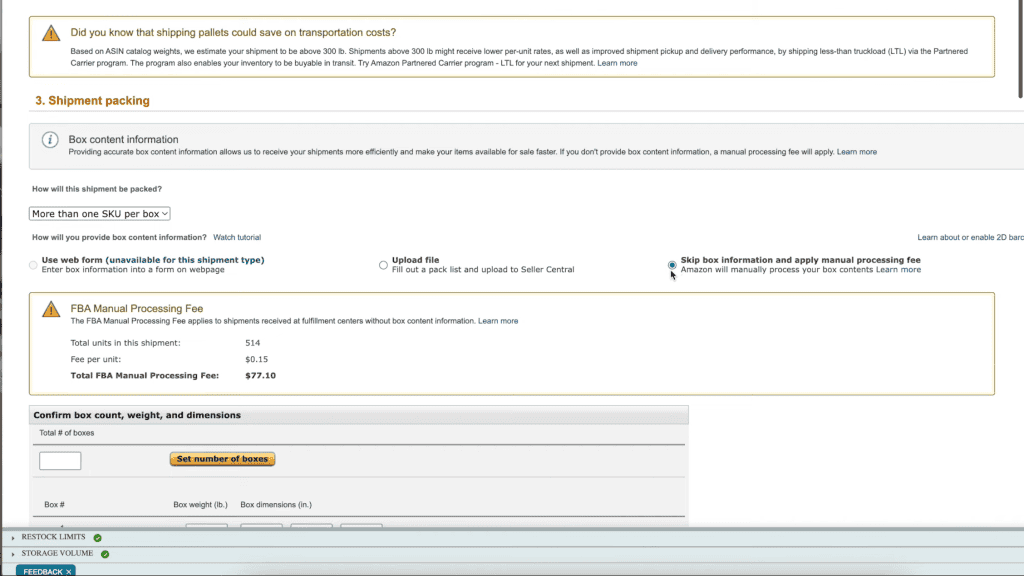
In the Shipment Packing section, choose “Skip box information and apply manual processing fee.” The manual processing fee is $0.15 per item and increases to $0.30 per item in Q4.
To me, it’s worth paying this fee because it eliminates the need to enter expiration dates, perform file uploads, and go through every item in your boxes.
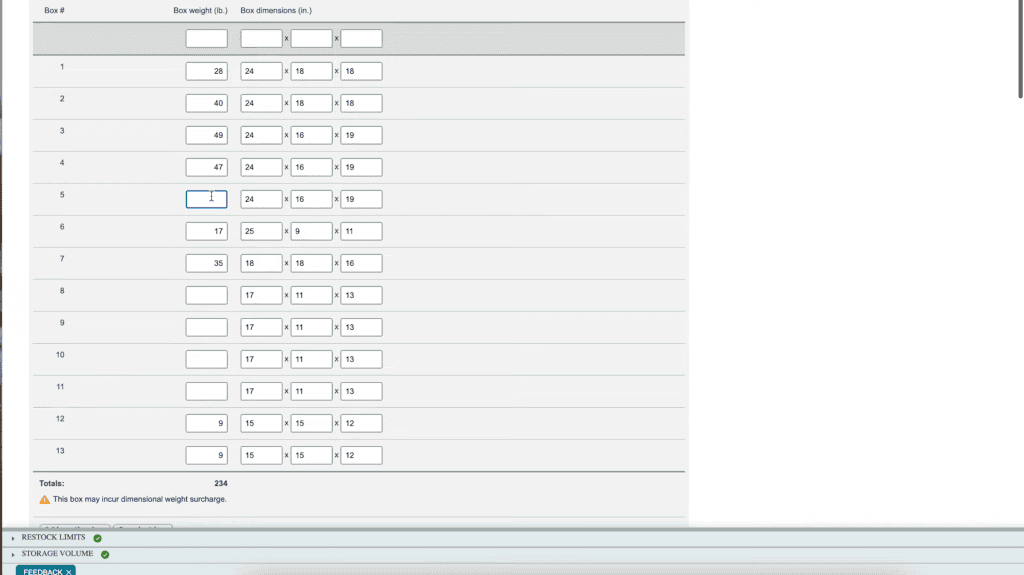
Count the boxes and have their weight and measurements ready. Enter this information for each box.
Accept the shipping charges and complete the shipment.
Print the shipping labels and affix them to the boxes before shipping the inventory to Amazon. With that, you are done shipping your latest Amazon FBA products and can sit back and relax, thanks to Inventory Lab!
If you want to learn how to send items to Amazon FBA easily, Inventory Lab simplifies preparing and packing Amazon Shipments. While it’s not a mandatory tool for running your Amazon business, its features can significantly streamline your operations and save valuable time.
I hope you found this guide for how to send product to Amazon FBA with Inventory Lab useful. Now, you can leverage Inventory Lab to optimize and focus more on growing your business.
To watch me use Inventory Lab to ship items to Amazon FBA onscreen, step-by-step, watch the YouTube version of this video. I share tutorials like this every week on my YouTube channel
We use cookies on our website to give you the most relevant experience by remembering your preferences and repeat visits. By clicking “Accept All”, you consent to the use of ALL the cookies. However, you may visit "Cookie Settings" to provide a controlled consent.
This website uses cookies to improve your experience while you navigate through the website. Out of these, the cookies that are categorized as necessary are stored on your browser as they are essential for the working of basic functionalities of the website. We also use third-party cookies that help us analyze and understand how you use this website. These cookies will be stored in your browser only with your consent. You also have the option to opt-out of these cookies. But opting out of some of these cookies may affect your browsing experience.
Necessary cookies are absolutely essential for the website to function properly. These cookies ensure basic functionalities and security features of the website, anonymously.
Cookie
Duration
Description
cookielawinfo-checkbox-analytics
11 months
This cookie is set by GDPR Cookie Consent plugin. The cookie is used to store the user consent for the cookies in the category "Analytics".
cookielawinfo-checkbox-functional
11 months
The cookie is set by GDPR cookie consent to record the user consent for the cookies in the category "Functional".
cookielawinfo-checkbox-necessary
11 months
This cookie is set by GDPR Cookie Consent plugin. The cookies is used to store the user consent for the cookies in the category "Necessary".
cookielawinfo-checkbox-others
11 months
This cookie is set by GDPR Cookie Consent plugin. The cookie is used to store the user consent for the cookies in the category "Other.
cookielawinfo-checkbox-performance
11 months
This cookie is set by GDPR Cookie Consent plugin. The cookie is used to store the user consent for the cookies in the category "Performance".
viewed_cookie_policy
11 months
The cookie is set by the GDPR Cookie Consent plugin and is used to store whether or not user has consented to the use of cookies. It does not store any personal data.
Functional cookies help to perform certain functionalities like sharing the content of the website on social media platforms, collect feedbacks, and other third-party features.
Performance cookies are used to understand and analyze the key performance indexes of the website which helps in delivering a better user experience for the visitors.
Analytical cookies are used to understand how visitors interact with the website. These cookies help provide information on metrics the number of visitors, bounce rate, traffic source, etc.
Advertisement cookies are used to provide visitors with relevant ads and marketing campaigns. These cookies track visitors across websites and collect information to provide customized ads.